Drawing Depth in Portraits: 5 Secrets for 3D Realism
You’ve done it. You’ve nailed the proportions, the eyes are in the right place, the nose is the right length, and the mouth is perfectly centered. However, something is… off. Your drawing, while technically correct, feels lifeless. It’s flat, like a deflated balloon, lacking the “pop” that makes a portrait feel real and three-dimensional. If you’re tired of your portraits looking like cartoon cutouts, you’ve come to the right place. The secret to breathing life into your drawings lies in mastering the art of drawing depth in portraits, and I’m here to show you how.
As an artist and teacher, I’ve seen countless students struggle with this exact problem. They spend hours perfecting the outline of a face, only to be disappointed when their shading efforts result in a muddy, one-dimensional mess. Fortunately, the good news is that creating depth is not some magical talent reserved for a select few. It’s a skill, and like any skill, it can be learned. This post will reveal the 5 key secrets that will transform your flat drawings into three-dimensional masterpieces that will have people asking, “How did you do that?”

Secret #1: Think in 3D – Essential for Drawing Depth in Portraits
First, the most crucial step to drawing depth in portraits is to change the way you see. As beginners, we tend to see the world in terms of flat shapes: a circle for the head, a triangle for the nose, a rectangle for the neck. However, to draw realistically, you need to think in terms of 3D forms: a sphere for the cranium, a wedge for the nose, a cylinder for the neck. This shift in perspective is the foundation of all realistic drawing.
Why Your Brain is Tricking You into Drawing Flat
Our brains are incredibly efficient, but they can also be lazy. To process the vast amount of visual information we encounter every day, our brains take shortcuts, simplifying complex 3D objects into easy-to-recognize 2D symbols. This is why you can recognize a smiley face as a face, even though it’s just a circle and a few lines. Therefore, when you’re drawing, you need to actively fight against this tendency to simplify. You need to train your brain to see the world as an artist does: as a collection of forms, planes, and values.
Actionable Tip: The “Block-In” Method for Drawing Depth in Portraits
One of the most effective ways to start thinking in 3D is to use the “block-in” method. Before you even think about drawing an eye or a lip, block in the major forms of the head using simple geometric shapes. Specifically, start with a sphere for the cranium, then add the planes of the face, the cylinder of the neck, and so on. In turn, this will help you to establish a solid foundation for your drawing and ensure that your portrait has a sense of volume and structure from the very beginning.

Secret #2: Master the Language of Light – The Key to Drawing Depth in Portraits
Secondly, light is the magic ingredient that transforms a flat drawing into a believable 3D illusion. To master shading for drawing depth in portraits, you need to understand how light behaves when it hits an object. Additionally, there are five core elements of shading that every artist should know:
- The Highlight: This is the brightest area of the object, where the light source hits it directly.
- The Mid-tone: This is the true color or value of the object, located between the highlight and the core shadow.
- The Core Shadow: This is the darkest part of the shadow on the object itself, located on the side opposite the light source.
- Reflected Light: This is the subtle light that bounces off of surrounding surfaces and illuminates the shadow areas.
- The Cast Shadow: This is the shadow that the object casts onto other surfaces.
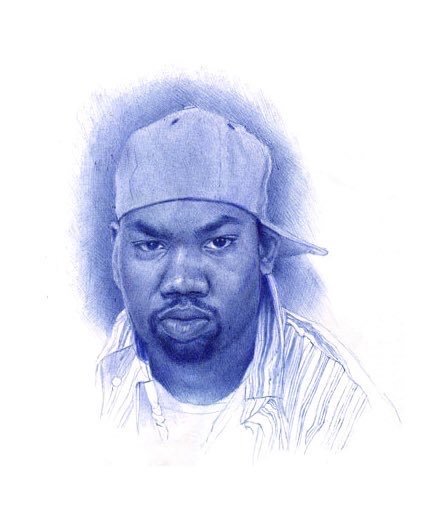
By identifying and accurately rendering these five elements, you can create a convincing illusion of light and shadow, which is the key to creating drawing depth in portraits.

Secret #3: Value is Your Superpower – Creating a Full Range of Tones
Thirdly, value in art, refers to the lightness or darkness of a color. Moreover, a full range of values, from pure white to pitch black, is essential for creating depth and realism in your drawings. Many beginners are afraid to use dark values, which results in drawings that look washed out and flat. Don’t be afraid of the dark! Pushing your darks and protecting your lights is what will make your drawings “pop.”
How to Create a Value Scale (And Why You Need One)
A value scale is a simple tool that will help you to see and create a full range of values. To create one, simply draw a long rectangle and divide it into nine equal sections. First, leave the first section white, and fill the last section in with the darkest black you can create with your pencil. Then, fill in the remaining sections with a gradual progression of grays. Use this value scale as a reference when you’re drawing to ensure that you’re using a full range of tones.
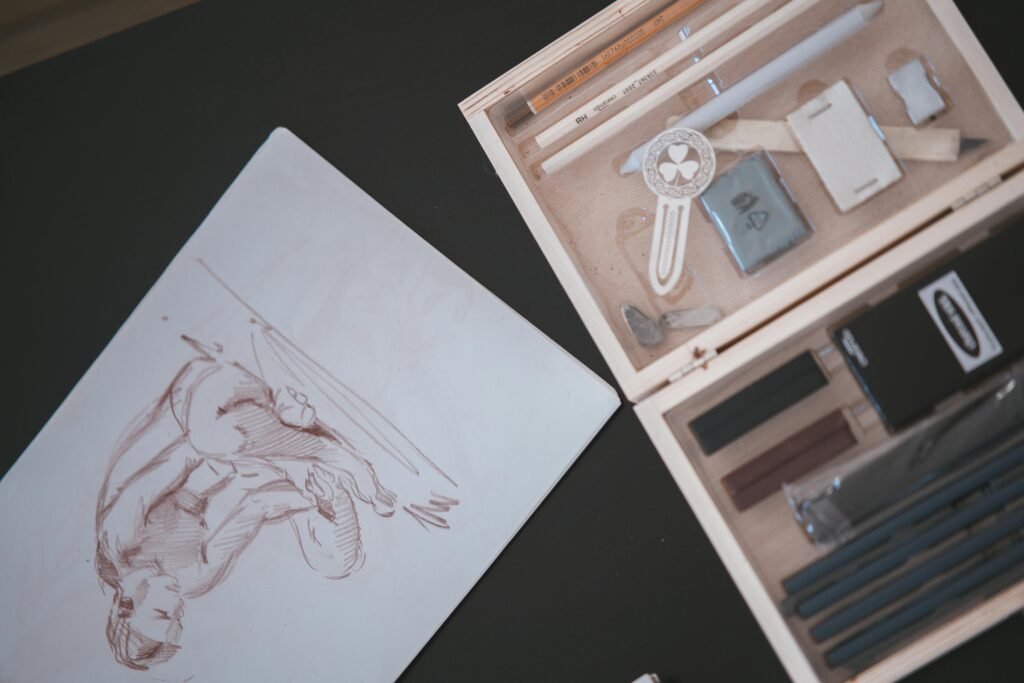
For achieving the darkest values and smoothest gradations, I highly recommend using a professional graphite pencil set with a full range from B to 12B. Having the right pencils makes all the difference in creating drawing depth in portraits.
Avoiding the “Muddy Middle”: Pushing Your Darks and Protecting Your Lights
To avoid the “muddy middle,” where all of your values are a similar shade of gray, make a conscious effort to push your darks and protect your lights. Furthermore, build up your darks gradually in layers, and use a kneaded eraser to lift out your highlights. This will create a strong sense of contrast and make your drawings more dynamic and visually interesting.
Secret #4: Control Your Edges – The Secret to Seamless Transitions in Drawing Depth in Portraits
Fourth, edge control is one of the most overlooked but most important aspects of realistic drawing. The edge is where two different values meet. By varying the quality of your edges, you can create a sense of depth and realism. In fact, mastering edge control is crucial for drawing depth in portraits.
- Hard Edges: Use hard edges for sharp, defined areas, such as the edge of a cast shadow or the line of the jaw.
- Soft Edges: Use soft edges for smooth, rounded forms, such as the turn of a cheek or the curve of a forehead.
- Lost Edges: Use lost edges where a form merges into the background or another form. This can create a sense of atmosphere and depth.
Secret #5: Choose the Right Tools & Techniques for Drawing Depth in Portraits
While you don’t need a lot of expensive tools to create beautiful drawings, having the right tools can make a big difference in achieving drawing depth in portraits. Here are a few essentials for your shading toolkit:
- Graphite Pencils: A set of graphite pencils with a range of hardnesses (from H to B) will allow you to create a full range of values.
- Blending Stumps and Tortillons: These are tightly rolled paper tools that can be used to blend and soften your pencil strokes. Similarly, a quality set of blending stumps from Dick Blick will help you achieve seamless transitions.
- Kneaded Eraser: A kneaded eraser is a soft, pliable eraser that can be molded into any shape. It’s perfect for lifting out highlights and creating subtle gradations.
Most notably, there are a variety of shading techniques to explore, such as cross-hatching, circulism, and smooth rendering. Experiment with different techniques to find the ones that work best for you and your style. Additionally, if you want to dive deeper into shading fundamentals, consider taking the free Drawing and Shading Techniques course on Alison.
Conclusion: Transform Your Flat Drawings into 3D Masterpieces
In conclusion, drawing depth in portraits is a skill that takes time and practice to develop. However, by understanding and applying these five secrets, you’ll be well on your way to transforming your flat, lifeless drawings into stunning, three-dimensional works of art. Remember to be patient with yourself, to embrace the learning process, and to celebrate your progress along the way. The journey from frustration to fantastic is a rewarding one, and I can’t wait to see what you create.
Now it’s your turn! Pick one of these secrets to focus on in your next drawing and share your results in the comments below. And don’t forget to subscribe to our newsletter for more drawing tips, tutorials, and inspiration. Happy drawing!