
The Ultimate Guide to Drawing Accurate Face Proportions
Have you ever spent hours on a portrait, only to step back and realize something looks… off? Maybe the eyes are too close together, or the nose seems to float awkwardly on the face. You’re not alone. Getting face proportions wrong is the number one frustration for aspiring portrait artists, and it can make even the most carefully rendered drawing look amateurish. Allow me to lend my decades of education and experience as a professional portrait artist to guide you. I’m happy to demonstrate ways you can begin drawing accurate face proportions.
The good news? Accurate face proportions aren’t a mystical talent reserved for the gifted few. They’re a learnable skill based on observable measurements and relationships. In this comprehensive guide, you’ll discover the exact methods professional artists use to achieve flawless facial proportions every single time.
As an Amazon Associate, I earn from qualifying purchases. This post also contains other affiliate links, and I may receive a commission if you make a purchase through them.
Why Drawing Accurate Face Proportions Matter More Than You Think
Before diving into techniques, let’s understand why proportions are so critical. The human brain is hardwired to recognize faces with extraordinary precision. We can detect even subtle deviations from “normal” facial relationships, which is why a portrait with slightly misplaced features triggers an immediate sense that something is wrong, even if we can’t articulate exactly what.
How Some Artists Get Side-Tracked When Drawing The Face
Many artists get caught up in the minutia of facial details instead of observing the larger components of the entire head. The face is quite a fascinating subject, and as a result it can easily cause the artist to go on a microscopic tangent of drawing. Instead of starting with the largest shapes and angles of the head, they begin drawing and rendering an eyeball, the nose, a lip etc. In order to achieve success in drawing accurate face proportions, a large to small approach is a must. Think of yourself as a sculptor. A sculptor is going to begin with a big slab of rock and gradually carve it down to an eventual likeness of their subject. They’re not going to start with a nostril, an ear or some other small detail without first establishing the largest aspect of their subject first.
The Benefits Of Facial Proportion Accuracy
When proportions are accurate, your drawing achieves instant credibility. The face looks believable, recognizable, and alive. Master proportions, and you’ve conquered the foundation upon which all other portrait skills—shading, texture, expression—are built.
The Classic Method: Understanding the Rule of Thirds for Faces
The most fundamental principle in facial proportions is the division of the face into thirds. This ancient technique, refined over centuries by master artists, provides a reliable framework for placing features accurately.
The Three Horizontal Divisions For Drawing Accurate Face Proportions
Imagine dividing the face from hairline to chin into three equal sections. The first third runs from the hairline to the eyebrows. The second third extends from the eyebrows to the bottom of the nose. The final third spans from the nose to the chin. This simple framework immediately tells you where major features belong.
Most beginners place the eyes too high on the head, leaving insufficient room for the forehead. By using the thirds method, you’ll automatically position features in their correct vertical relationships, creating a balanced, natural-looking face.
The Five-Eye Width Rule
Horizontally, the average face is approximately five eye-widths across. One eye-width of space sits on either side of the face, one eye-width separates the two eyes, and each eye occupies one eye-width. This measurement provides an instant check for facial width and eye spacing.
When you’re struggling with eye placement, measure one eye-width between them. If they look too close or too far apart, you’ve likely miscalculated this critical measurement. In my personal experience, drawing is a constant activity of measuring spaces, shapes and angles of subjects you perceive. Hence, the eye width rule is one of the important techniques for drawing accurate face proportions.

The Loomis Method: A Professional’s Secret Weapon
While the rule of thirds works beautifully for frontal views, what happens when the head tilts or turns? This is where the Loomis method becomes invaluable. Developed by legendary illustrator Andrew Loomis, this technique uses a sphere-and-plane construction to maintain accurate proportions from any angle. It may be the first technique of drawing I ever learned as a child, but from a book called “How To Draw Comic The Marvel Way”. As I began to look at the face as a series of shapes and angles, it improved my ability for drawing accurate face proportions.
How Loomis Practiced Drawing Accurate Face Proportions
The Loomis method begins by drawing a sphere to represent the skull, then adding a plane for the face. By dividing this construction with carefully placed guidelines, you can map out feature placement that remains proportionally correct regardless of perspective. If you’re serious about portrait drawing, studying the Loomis method through his classic book “Drawing the Head and Hands” is an investment that will pay dividends for years to come.
Measuring Tools To Eliminate The Guesswork
Even with solid knowledge of proportional relationships, translating what you see into accurate measurements on paper can be challenging. This is where specialized drawing tools become game-changers. I wish I had implemented these tools earlier in my art journey!
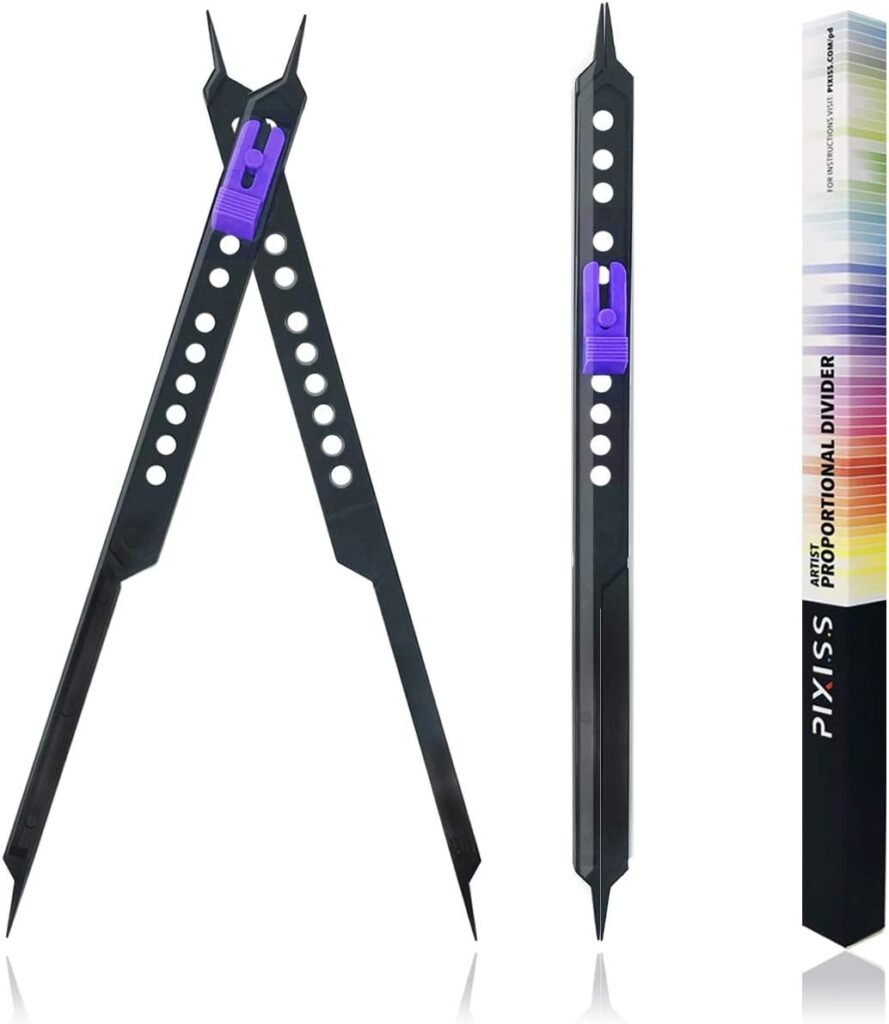
The Proportional Divider: Your Precision Instrument
A proportional divider is an adjustable measuring tool that allows you to transfer measurements from your reference to your drawing while maintaining perfect proportional relationships. Whether you’re scaling up or down, this tool ensures mathematical accuracy. The Proportional Divider Artist Drawing Tool is particularly popular among portrait artists for its durability and precision.

For those seeking professional-grade equipment, the Derwent Scale Divider offers exceptional build quality and allows you to work in ratios from 4:1 to 1:4, making it perfect for both enlarging and reducing your reference images.
The Sight-Size Method
If you prefer a tool-free approach, the sight-size method uses your pencil as a measuring device. Hold your pencil at arm’s length, align the tip with one facial landmark, and use your thumb to mark another landmark. Transfer this measurement to your drawing. While this technique requires practice to master, it’s incredibly versatile and costs nothing.
Common Proportion Mistakes and How to Fix Them
Mistake #1: Eyes Placed Too High
The most frequent error beginners make is positioning the eyes in the upper half of the head. In reality, eyes sit at the halfway point between the top of the head and the chin. Draw a horizontal line exactly halfway down the head—that’s your eye line.
Mistake #2: Ears in the Wrong Position
Ears are often drawn too small and placed randomly. The correct position: the top of the ear aligns with the eyebrow, and the bottom aligns with the base of the nose. The ear should be roughly the same height as the distance from eyebrow to nose bottom.
Mistake #3: Ignoring the Jawline
Many artists focus so intensely on the eyes, nose, and mouth that they neglect the jawline and chin. The distance from the bottom of the nose to the chin should equal the distance from the bottom of the nose to the eyebrows. Measure this relationship carefully to avoid a weak or overly prominent chin.
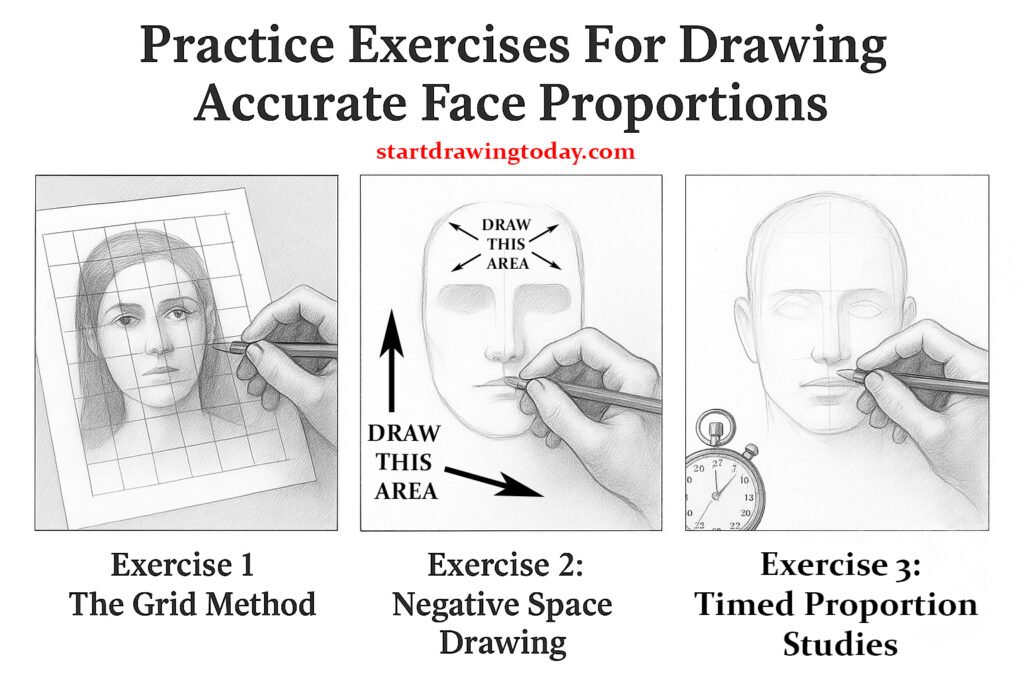
Practice Exercises For Drawing Accurate Face Proportions
Knowledge without practice remains theoretical. Here are targeted exercises to transform your understanding into muscle memory.
Exercise 1: The Grid Method
Place a grid over your reference photo and draw a corresponding grid on your paper. Focus exclusively on copying the proportional relationships within each grid square. This exercise trains your eye to see spatial relationships accurately.
Exercise 2: Negative Space Drawing
Instead of drawing the features themselves, draw the spaces between and around them. This counterintuitive approach bypasses your brain’s tendency to draw what it “thinks” a face should look like, forcing you to observe actual proportions.
Exercise 3: Timed Proportion Studies
Set a timer for five minutes and sketch only the proportional framework of a face—no details, just the placement and size relationships of major features. Repeat this with different references daily. Speed forces you to focus on the essential proportional relationships rather than getting lost in details.

Taking Your Learning Further
While this guide provides a solid foundation, deepening your understanding through structured learning can accelerate your progress dramatically. The Introduction to the Science of Drawing free online course offers comprehensive instruction in drawing fundamentals, including detailed modules on proportion, measurement techniques, and visual perception.
From Frustration to Confidence: Your Path Forward
Mastering face proportions isn’t about innate talent—it’s about understanding measurable relationships and training your eye to see them accurately. With the methods outlined in this guide, you now have a systematic approach to achieving accurate proportions in every portrait you draw.
Start with the rule of thirds to establish your foundation. Practice the Loomis method to handle complex angles. Use measuring tools to verify your observations. And most importantly, draw consistently. Every face you study strengthens your proportional intuition.
The transformation from frustration to flawless proportions isn’t instantaneous, but it is inevitable when you apply these principles systematically. Your next portrait can be the one where everything finally clicks into place—where the eyes sit exactly right, the features balance perfectly, and you step back with genuine pride in what you’ve created.
Now pick up your pencil. Your journey from proportion struggles to portrait mastery begins with a single, accurately measured line.